 With Tips from a Professional Contractor
When it comes to hanging drywall, you can save hundreds or even thousands of dollars by doing it yourself. It’s not easy, but it’s not brain surgery, either. All you need is arm strength, determination, and patience.
The costs associated with professional drywall installation can run you from anywhere between $65 and $80 an hour alone. Factor in the cost of tools, materials, and supplies, and you can be looking at a pretty hefty bottom line. The average 12’x12’ room can cost upwards of $1,000 to hang, and that doesn’t include taping, sanding, or finishing or other essentials like old drywall removal, cleanup, and debris disposal.
After hearing all that, my bet is you’re ready to get started! Let’s do it!
The good news is there is no mystery when it comes to hanging drywall. It’s a pretty straightforward process, and even beginners can do it—but only if you’re equipped with plenty of perseverance, the proper tools, and a clear understanding of what to do and when. It’s not math, but when it comes to hanging drywall, everything has to be done in a certain order or else you’ll be facing some frustrating problems.
What we’ll be covering in this article is primarily the hanging process, but don’t worry! You can check out my other articles on drywall below.
See my other drywall-related articles:
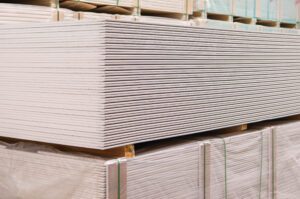
First things first. Drywall is essentially gypsum plaster pressed between heavy paper, dried, and cut into panels or sheets. Drywall is also known as plasterboard, wallboard, and sheetrock, so if you see those terms while shopping for tools or supplies, they’re all referring to drywall.
Another much more important fact is that not all drywall is created equal. Drywall comes in different dimensions and thicknesses, and certain types are better than others for certain jobs.
You essentially have four choices when it comes to selecting drywall thickness: 5/8-inch, 1/2-inch, 3/8-inch, and 1/4-inch. Here’s what that means and how they’re used:
5/8-inch (15.9mm): The heaviest and most soundproof
1/2-inch (12.7mm): The standard thickness for most residential projects
3/8 inch (9.52mm): Best for covering existing walls
1/4 inch (6.35mm): The best choice for curved walls and arches
 After determining the thickness, your next decision is the size and number of drywall panels you’re going to need. Your goal is to create as few seams and joints as possible, so the larger the panel, the fewer panels you need. However, larger drywall sheets are considerably heavier, and can be difficult to transport and maneuver around the project site (up and down stairs, around corners, etc.).
Weight is a big consideration. A standard 1/2-inch 4’ X 8’ panel weighs about 50 pounds and can be managed by a single person. Thicker and/or longer boards are heavier and bulkier, so, they typically require two people to transport and hang them.
Here’s a guide to the three general drywall panel sizes:
4’ x 8’
4’ x 10’
4’ x 12’
At this point, you’re ready to figure out how much drywall you’ll need for the project.
I’ve found that the best way to determine this is by adding total surface areas and dividing by square feet per sheet. For example, a 4’ × 8’ sheet will cover 32 square feet and a 4’ × 12’ sheet will cover 48 square feet. A standard 16’ x 16’ bedroom with eight-foot ceilings, for example, will add up to about 768 square feet. Deduct square footage for window and door cutouts to come up with an accurate total.
I usually get just enough to do the job. I’d rather go out for another sheet or two than get stuck with extra drywall. It’s not easy to store and you can’t really set it out with your garbage cans on collection day.

Surform Plane

A drywall lift with rolling casters
Ok, now we’re finally ready to begin the hanging process. We’ll take it step by step.
Before hanging the first panel, make sure to measure the panels and cut them to fit your wall. Place the panel light-side up (this is the side you’ll want facing the room). Use your T-square to create an even line and use your utility knife to score the panel deep enough to cut through the paper and about halfway into the core. Snap the panel downward away from the cut to create a clean edge. Smooth out the edges with a surform plane or a rasp.
Line up the first panel with where it will be hung. Take a carpenter’s pencil and mark the position of the studs on the front of the drywall panel. These marks will help you locate the studs later when you move to Step 2.
Next, you’ll be applying the adhesive to the studs. Start by cutting the tip of the adhesive spout to create a 1/4-inch bead size and use your caulking gun’s metal rod to puncture the seal. Load the adhesive cartridge into the gun and apply adhesive to the studs where you’ll be hanging the first panel. Start at the top near the ceiling, since it’s easier to work your way down. Make sure to set the drywall onto the adhesive within 15 minutes, otherwise the adhesive will begin to dry, and the bond won’t be as true.
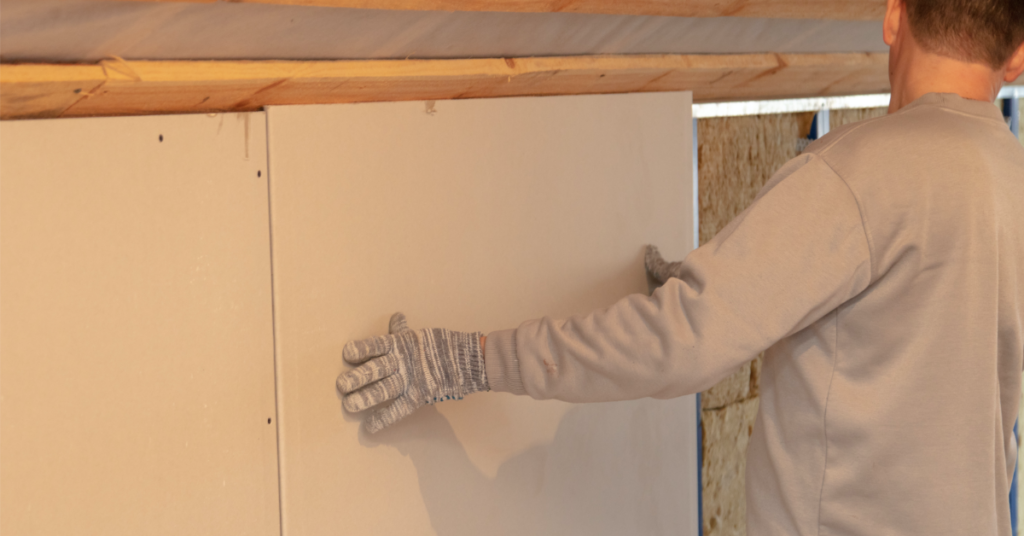
From here, you’ll want to move the drywall panel into position and set it against the adhesive. If you’re not using a drywall lift, you’ll want to have a friend help you with this part, since even the lightest drywall panels are heavy, and you’ll want to start drilling in the screws as soon as possible.
While holding the first sheet horizontally across the ceiling and close to the corner, firmly press the panel against the wall, creating a clean, even 90-degree angle with the ceiling. Now you’re ready to fasten the sheets to the studs. Pros never secure drywall with nails anymore, and neither should you.
Here’s why you should use screws instead of nails:
Why you should use a drywall screw gun:

There are various styles of adapters and attachments for converting conventional drills into screw guns, but I don’t think the results aren’t as good. In my opinion there’s no substitute for a good drywall screw gun.
Once the drywall is firmly in place, begin driving your screws along the outer edges of the panel, starting at the top nearest the ceiling. Working from the center outward, drive screws into each stud at 12-inch intervals about a 1/2-inch from the outer edge of the panel. Do the same along the bottom edge. Now you’re ready for the bottom panel.
Move the bottom panel (which you’ve already cut to the proper dimensions) into position. Then, use a pry bar or foot lift to secure the panel firmly against the top sheet so you have a nice, tight seam.
When moving the bottom sheet into place, be sure to leave a 1/2-inch gap between the bottom edge of the panel and the floor. You can use baseboards to cover these gaps once you’ve finished the drywall project.
Drive the screws into the bottom panel, using the center-out method described above.
PRO TIP #1: When it comes to adding additional sheets of drywall, it’s a good idea to stagger the seams. Covering and smoothing the joints where the seams meet can be relatively challenging, and staggering the joints makes them less visible.
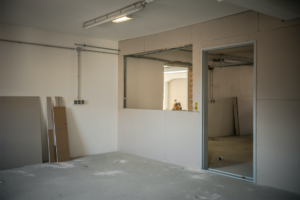
When adding additional panels, be sure to accommodate for window and door openings. You want the joints where the sheets meet to be centered horizontally and vertically around the openings rather than at their corners. This will help prevent wall cracks from forming at the corners of doors and windows later on.
 To cut around a window:
To cut around a door:
To cut for outlets or other receptacle holes:
PRO TIP #2: One of the easiest ways to properly locate receptacle holes on drywall is to rub the edges of the opening with lipstick or dry-erase marker and then press the sheet up against the opening at its final position. This will create an outline on the drywall, giving you a clear location for where to cut the hole.
When creating corners with drywall, you’ll need to make sure the outside edges where the panels meet are straight and clean.
Here are a few more tips for framing outside corners:
Once you’ve finished hanging drywall, you’re now ready to move onto the next phase, which is the taping process. Before you begin, however, make sure you pick up any debris and sweep the floor clean.
Let me know how your project goes in the comments below. Also, feel free to ask any questions you might have. I’ll do my best to answer them.

Comments (No Comment)
No comments yet.